Why Adobe Creative Cloud Slows Down Your Mac and How to Fix It
You’re working on a design in Photoshop, switching between a few browser tabs, and everything seems fine. Then your Mac […]

You’re working on a design in Photoshop, switching between a few browser tabs, and everything seems fine. Then your Mac starts slowing down. The cursor hesitates, applications take longer to respond, and even simple tasks begin to feel frustrating.
If you use Adobe Creative Cloud regularly, you might have experienced something similar.
It’s easy to blame a large Photoshop file or an aging MacBook. Sometimes that’s exactly the problem. But Adobe also runs several background processes that can affect performance, even when you’re not actively editing anything.
The good news is that you don’t necessarily need a new computer or more powerful hardware to improve the situation. A little troubleshooting can help you understand what’s slowing things down and what you can safely do about it.
Why Does Adobe Creative Cloud Slow Down Your Mac?
Adobe Creative Cloud is more than a collection of design applications. Alongside tools such as Photoshop, Illustrator, and Premiere Pro, it includes background services responsible for updates, licensing, syncing files, and managing shared creative resources.
These services are useful. They help Adobe applications work together without requiring you to manage everything manually.
However, there are situations where Creative Cloud may consume more system resources than expected.
For example, an application might be downloading an update while you’re editing a large image. Another Adobe process could be synchronizing files or refreshing content in the background. If you’re already working with several demanding applications, that additional activity can make your Mac feel less responsive.
Older versions of Creative Cloud have also experienced issues with excessive CPU usage while the desktop application is idle.
That doesn’t mean Adobe software is inherently bad for Mac performance. It simply means that identifying the cause is more useful than immediately deleting files or changing system settings.
Recognizing Adobe Creative Cloud Performance Issues
Mac performance problems don’t always appear as a complete freeze. More often, they’re small interruptions that gradually become difficult to ignore.
You might notice Photoshop taking unusually long to open, your MacBook becoming warmer during ordinary tasks, or the fans running more frequently on models that have them.
Sometimes the slowdown continues even after you’ve closed your Adobe applications.
That last situation is worth investigating.
Closing Photoshop or Illustrator doesn’t necessarily stop every related background service. Creative Cloud may continue running processes that handle updates, synchronization, and other application features.
Of course, these symptoms aren’t exclusive to Adobe software. Browser tabs, insufficient available memory, limited storage space, and other applications can produce similar problems.
The first step is finding out what’s actually using your Mac’s resources.
Check What’s Using Your Mac’s CPU and Memory
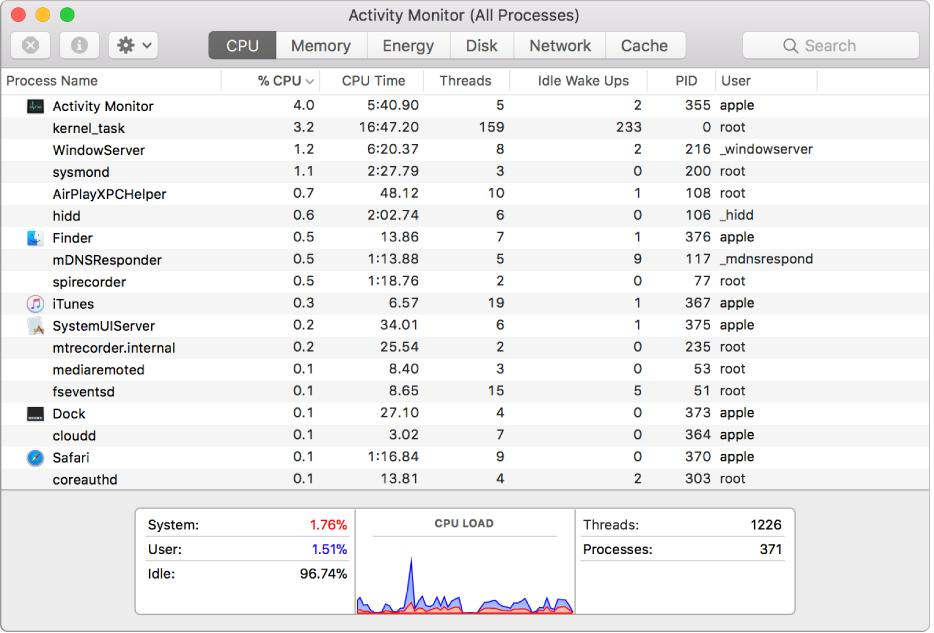
Before changing anything in the Creative Cloud, open Activity Monitor.
It’s a built-in macOS utility that shows which applications and processes are consuming CPU, memory, and other system resources.
You can open it through Spotlight by pressing Command + Space, typing Activity Monitor, and pressing Return.
Once it’s open, select the CPU tab and sort the processes by % CPU.
Look for anything consistently using a substantial amount of processing power.
A temporary spike isn’t necessarily a problem. For example, exporting a video or opening a complex Photoshop document can naturally require significant resources.
What’s more interesting is a process that continues consuming CPU while you’re doing very little.
If you see Adobe-related processes near the top, take note of their names rather than immediately quitting them.
Next, switch to the Memory tab and look at the memory pressure graph.
If memory pressure remains high, your Mac may be struggling to handle everything that’s open. Closing unused applications or browser tabs could provide relief without changing anything in Adobe’s settings.
This quick check helps you avoid troubleshooting the wrong problem.
Understanding Adobe Background Processes and CCXProcess
When browsing Activity Monitor, you may encounter unfamiliar process names associated with Adobe Creative Cloud.
One of them is CCXProcess.
CCXProcess is a legitimate Adobe component associated with the Creative Cloud experience. Adobe uses background services to support different parts of its software ecosystem, including creative resources, updates, and application functionality.
Most of the time, these processes work quietly, and there’s no reason to interfere with them.
However, certain Creative Cloud versions or software conflicts can cause abnormal resource usage. CCXProcess has previously been associated with performance issues on some Macs, particularly when older software versions are involved.
If you notice CCXProcess consistently consuming excessive CPU, first check whether Creative Cloud is up to date.
You can also quit the affected process through Activity Monitor as a temporary troubleshooting measure, although it may launch again automatically.
It’s important to understand that removing an Adobe background component can affect features used by Creative Cloud applications.
For users considering getting rid of CCXProcess, MacPaw provides a more detailed explanation of the process, why it may cause performance problems, and the troubleshooting options available before removal.
The key is to identify whether CCXProcess is actually contributing to the slowdown rather than assuming every unfamiliar process is unnecessary.
How to Fix Adobe Creative Cloud Performance Problems on Mac
Once you’ve identified a possible cause, you can begin working through the problem.
Start with the simplest changes. There’s rarely a good reason to make major system modifications before checking for outdated software or temporary glitches.
Update Adobe Creative Cloud and Its Applications
Software updates are among the first things worth checking when Adobe applications behave unexpectedly.
An outdated version of Creative Cloud may contain bugs that have already been resolved in a newer release.
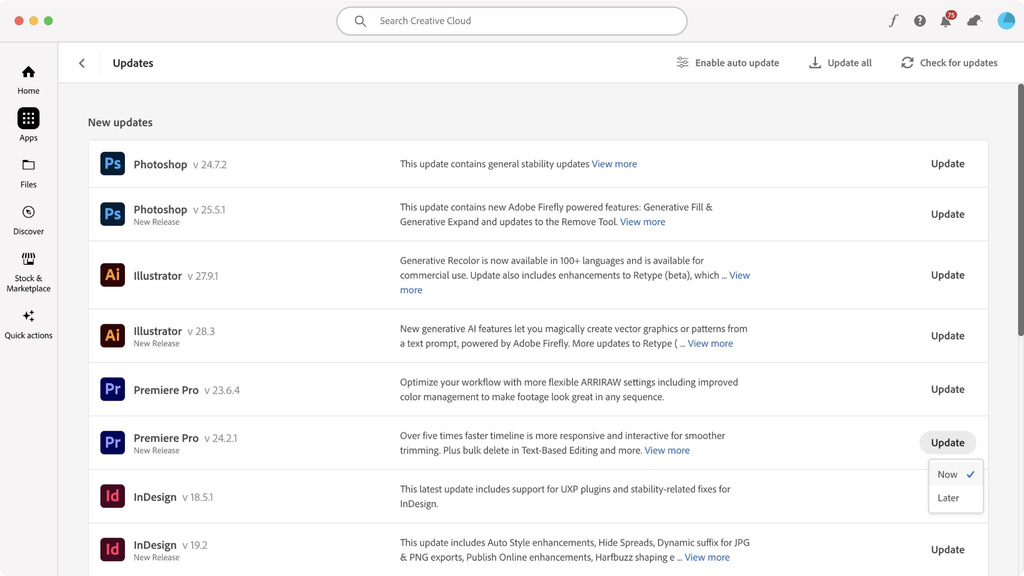
Open the Creative Cloud desktop application and look for available updates. Install any relevant updates for Creative Cloud and the Adobe applications you use regularly.
Once everything is updated, restart your Mac.
Restarting gives the applications a fresh start and clears temporary process states that may have contributed to the problem.
After your Mac starts again, use it normally for a while and check whether the same slowdown returns.
If performance improves, you may not need to do anything else.
Close Unnecessary Applications While Working
Creative software often requires substantial processing power and memory, particularly when you’re working with high-resolution images, complex illustrations, or video projects.
Running multiple demanding applications simultaneously can make performance problems more noticeable.
For instance, keeping Photoshop, Illustrator, several browser windows, and a video editing application open at the same time can place considerable pressure on available memory.
Try closing applications you’re not actively using.
You don’t have to shut down your entire workflow. Simply reducing unnecessary background activity may give your main creative application more room to operate.
For designers and content creators who spend long hours switching between projects, this small habit can make everyday work noticeably more comfortable.
Review Creative Cloud Background Activity
Not every background process needs to be active for every task, but it’s important to distinguish optional startup behavior from services Adobe requires.
Open System Settings > General > Login Items & Extensions to review which applications launch when you sign in.
You can consider disabling unrelated applications that you don’t need immediately after startup.
Be more careful with Adobe Creative Cloud and its associated background services.
Adobe advises keeping required Creative Cloud login items enabled because turning them off can interfere with updates, synchronization, and other application features.
If Creative Cloud appears to be causing problems, updating or repairing the application is generally a better starting point than permanently disabling its supporting processes.
Check for Software Conflicts
Sometimes the problem isn’t caused by Creative Cloud alone.
Other applications, browser extensions, and background utilities may interfere with Adobe services or compete for the same system resources.
For example, MacPaw has documented cases where conflicts involving certain ad-blocking software were associated with CCXProcess performance problems.
If the slowdown began shortly after installing a new application or utility, consider whether the timing is connected.
You can temporarily disable a recently added browser extension or compatible third-party utility to see whether performance changes.
Avoid removing important applications without checking what they do, and reverse any temporary changes that don’t help.
The goal is to isolate the cause, not make unnecessary changes across your Mac.
Reinstall Creative Cloud If the Problem Continues
If Creative Cloud keeps consuming excessive CPU even when you’re not using Adobe applications, reinstalling the desktop app may be worth considering.
Adobe recommends this approach for certain persistent high CPU or energy usage problems involving older versions of Creative Cloud.
Before proceeding, save your work and close any open Adobe applications.
Use Adobe’s official Creative Cloud uninstaller rather than manually deleting random files from your Library folders.
After uninstalling the desktop application, download the latest version from Adobe and follow the installation instructions.
Depending on your setup, you may also need to reinstall or reconnect individual applications.
Reinstallation takes more effort than a routine update, so it’s best treated as a later troubleshooting step rather than the first solution you try.
Preventing Creative Cloud Slowdowns in the Future
Once your Mac is performing normally again, a few sensible habits can help reduce the chances of similar problems.
Keep Creative Cloud and macOS updated, particularly when new releases include stability improvements or bug fixes.
It’s also worth paying attention to your available storage. Creative applications often generate temporary files, previews, caches, and project exports. When storage becomes limited, working with large files can become more frustrating.
Review old exports and unnecessary downloads occasionally, but avoid deleting application support files unless you know what they contain.
Another useful habit is checking Activity Monitor when something feels unusually slow.
You don’t need to monitor your CPU usage constantly. Just knowing how to identify an abnormal process can save time when an application starts behaving differently.
If you rely on Adobe software for professional work, consider saving important projects and maintaining regular backups before performing more involved troubleshooting.
A stable creative workflow is much easier to maintain when you understand how the software behaves in the background.
When Is a Slow Mac Actually a Hardware Problem?
Not every performance issue can be solved by updating software.
If your Mac regularly struggles with demanding projects, even after you’ve ruled out unusual background activity, the hardware may be reaching its practical limits.
Large Photoshop documents, high-resolution video timelines, and complex design projects can consume significant memory and processing resources.
A Mac with limited unified memory or older hardware may simply have difficulty running several demanding applications together.
Before considering an upgrade, compare performance across different workloads.
Does the Mac slow down only when a particular Adobe application is open? Does the problem disappear after closing background applications? Or does everything remain sluggish, regardless of what you’re doing?
These observations can help you determine whether the problem is related to Adobe, your broader software setup, or the computer itself.
An upgrade may eventually make sense, but understanding the cause first helps you avoid an unnecessary purchase.
Frequently Asked Questions
Why is Adobe Creative Cloud using so much CPU on my Mac?
Creative Cloud runs background services that support updates, syncing, licensing, and other features. CPU usage may increase during certain activities, but persistently high usage while the application is idle could indicate an outdated version or a software issue.
Is CCXProcess safe on Mac?
Yes. CCXProcess is a legitimate Adobe component. Its presence in Activity Monitor doesn’t automatically indicate malware or a security problem. If it uses excessive resources, check Creative Cloud updates and troubleshoot the process before considering removal.
Can I stop Adobe Creative Cloud from running in the background?
Some startup behavior can be managed through macOS settings, but Adobe relies on background services for important functions. Disabling required services may interfere with updates, syncing, or application features.
Will reinstalling Creative Cloud make my Mac faster?
It may help if the slowdown is caused by a faulty or outdated Creative Cloud installation. However, reinstalling won’t necessarily solve problems related to insufficient memory, limited storage, or demanding workloads.
Final Thoughts
A slow Mac can interrupt your workflow, especially when you’re trying to finish a design, meet a deadline, or move between creative applications.
Adobe Creative Cloud can contribute to performance problems in certain situations, but that doesn’t mean its background services should automatically be removed.
Start by checking Activity Monitor, updating your software, and identifying any processes using more resources than expected. If the issue persists, investigate possible software conflicts or consider reinstalling Creative Cloud through Adobe’s official tools.
Most importantly, make changes based on what your Mac is actually doing.
A little time spent identifying the cause is usually more productive than deleting unfamiliar processes and hoping the problem disappears.

Written by Twastia Editorial Team
Twastia Editorial Team shares practical insights about website design, SEO services, Google Ads, content marketing, social media, conversion rate optimization, and digital marketing strategy.
Last updated: Nov 10, 2026
Related posts from Twastia
Explore more useful articles from twastia.com about digital marketing, SEO, websites, ads, content, and growth strategy.