Common Mistakes DIY Painters Make: Best Tips for a Flawless Finish
Painting your home is one of the most accessible ways to refresh its appearance without undertaking a major renovation. A […]
Painting your home is one of the most accessible ways to refresh its appearance without undertaking a major renovation. A new wall color can brighten a bedroom, modernize a living room, or make an older property feel more welcoming. With basic supplies and some free time, many homeowners decide to handle painting projects themselves.
However, achieving smooth, attractive results requires more than opening a paint can and picking up a roller.
Understanding the common mistakes DIY painters make can help you avoid frustrating problems such as uneven coverage, peeling paint, visible brush marks, and damaged furniture.
Many painting problems begin before the first coat is applied. Inadequate surface preparation, unsuitable tools, poor timing, and incorrect application methods can affect the final appearance and durability of a paint job.
According to paint manufacturer Sherwin-Williams, inadequate surface preparation is a major contributor to coating failure because it interferes with proper paint adhesion. Sherwin-Williams
Fortunately, many beginner painting errors are preventable with careful planning and basic knowledge.
This guide explores common mistakes homeowners make when painting, explains why they happen, and offers practical ways to achieve cleaner, longer-lasting results.
Why DIY Painting Projects Sometimes Go Wrong
Painting appears straightforward, but several factors influence the finished surface.
The condition of the wall, paint formulation, application tools, room temperature, humidity, and drying conditions all affect how paint performs.
A homeowner may choose an attractive color and high-quality paint but still experience disappointing results if the surface is dirty or improperly prepared.
Similarly, painting too quickly can produce drips, streaks, and uneven finishes.
Successful DIY painting involves treating the project as a sequence of tasks rather than one continuous application.
Preparation, protection, priming when necessary, careful painting, and proper drying all contribute to the outcome.
Recognizing these steps is the foundation of avoiding preventable mistakes.
1. Skipping Proper Surface Preparation
One of the most common mistakes DIY painters make is applying new paint directly over an unprepared wall.
Even walls that appear clean may contain dust, grease, fingerprints, loose paint, or other substances that interfere with adhesion.
Why Surface Preparation Matters
Paint needs a suitable surface to form a durable coating.
If the underlying wall is contaminated or deteriorating, the new finish may peel, blister, or look uneven.
Small cracks and nail holes can also become more noticeable after painting, particularly under direct or angled lighting.
How to Avoid This Mistake
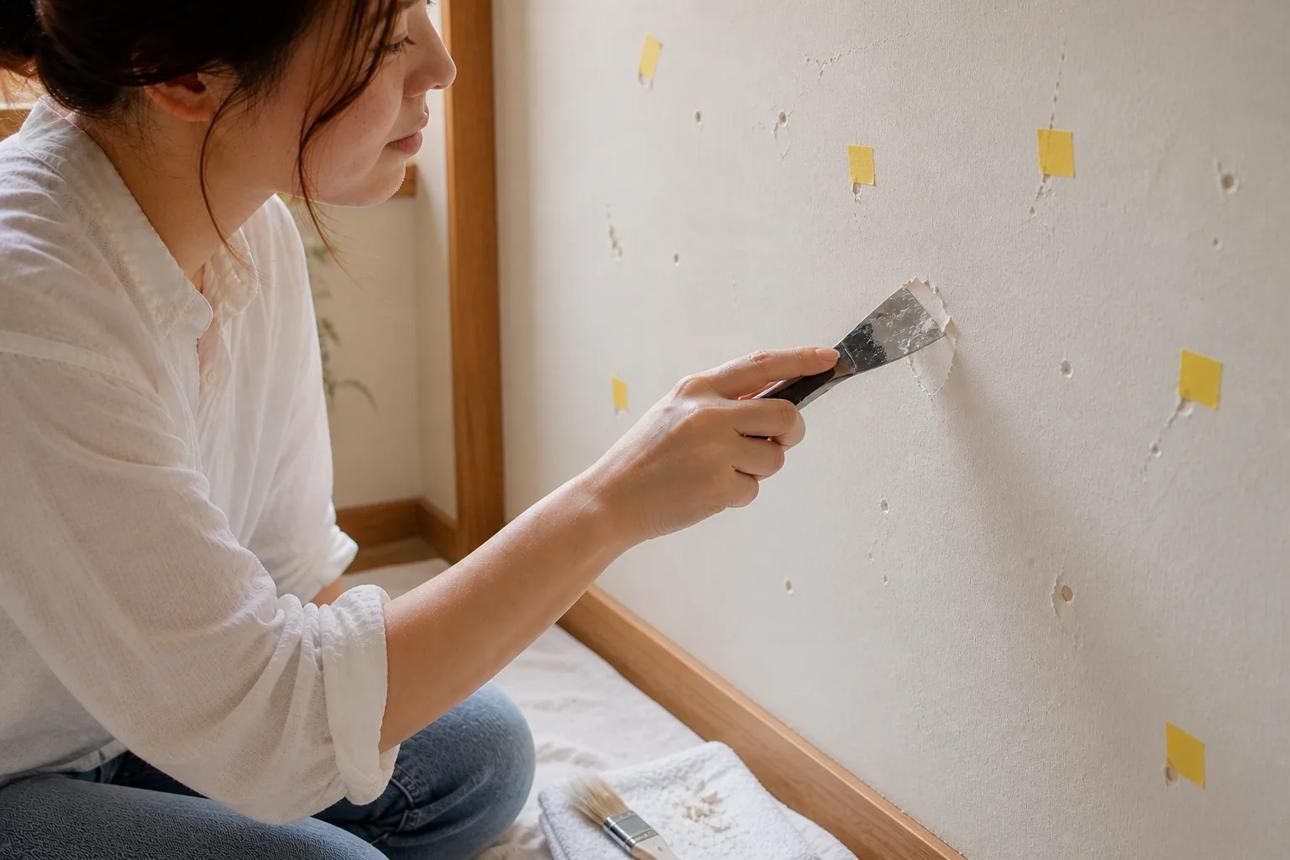
Before painting, remove loose dirt and clean the surface with a product appropriate for the wall material.
Allow the surface to dry thoroughly.
Repair small holes using a suitable patching compound, then smooth and prepare the repaired areas as directed.
Remove remaining dust before applying primer or paint.
For previously painted glossy surfaces, additional preparation may be necessary to improve adhesion.
Always identify potential lead paint hazards before sanding or scraping older coatings.
2. Choosing the Wrong Type of Paint
Not every paint product is suitable for every surface.
Interior walls, bathroom ceilings, exterior siding, cabinetry, and trim can have different coating requirements.
Using the wrong product may lead to poor durability, cleaning difficulties, or disappointing appearance.
Understanding Paint Finishes
Paint finishes vary in sheen, which affects how much light the surface reflects.
Flat and matte finishes typically create a subdued appearance and can help conceal minor surface imperfections.
Eggshell and satin finishes offer more noticeable sheen, while semi-gloss finishes are commonly used for trim and other surfaces requiring frequent cleaning.
However, durability varies by product formulation, not merely by the finish name.
Selecting Paint for the Room
Consider how the space is used.
A low-traffic bedroom may have different requirements than a busy hallway or moisture-prone bathroom.
Choose paint specifically formulated for the relevant surface and environmental conditions.
Read the manufacturer’s specifications rather than relying solely on color or promotional claims.
3. Ignoring the Importance of Primer
Primer is frequently overlooked because homeowners assume that an additional preparation coat wastes time and money.
However, primer can be important when dealing with bare drywall, porous materials, stains, repaired surfaces, or significant changes in paint color.
What Happens Without Proper Priming?
Certain surfaces absorb paint unevenly.
For example, freshly patched drywall may have a different porosity from the surrounding painted wall.
Without suitable preparation, repaired areas can appear noticeably different after the finish coat dries.
Primer can help create a more uniform surface and support adhesion.
When Should You Use Primer?
Consider primer when painting:
- New or previously unpainted drywall.
- Patched and repaired wall surfaces.
- Bare wood or other porous materials.
- Surfaces requiring stain-blocking treatment.
- Substrates where the paint manufacturer recommends a primer.
Some modern paints may perform adequately without separate primer on properly prepared, previously painted surfaces.
Follow the coating manufacturer’s instructions for your specific situation.
4. Using Cheap or Incorrect Painting Tools
Another frequent problem involves selecting unsuitable brushes, rollers, and accessories.
Low-quality tools may shed fibers, hold paint unevenly, or make controlled application difficult.
The incorrect roller cover can also create excessive surface texture or inconsistent coverage.
Match the Roller to the Surface
Smooth walls generally require a shorter roller nap than heavily textured surfaces.
Longer nap rollers can reach into irregular textures, while shorter naps are commonly selected for smoother finishes.
The appropriate choice also depends on the coating and desired appearance.
Sherwin-Williams identifies incorrect roller nap size, unsuitable brushes, and excessive paint application as possible causes of visible marks. Sherwin-Williams
Invest in Useful Essentials
A practical DIY painting kit includes quality brushes, appropriate rollers, a sturdy tray, painter’s tape, drop cloths, and basic preparation tools.
You do not need the most expensive equipment available.
However, suitable tools can make painting easier and reduce the likelihood of avoidable defects.
5. Applying Too Much Paint at Once
Applying an excessively thick coat is another common mistake.
Beginners sometimes overload the roller because they believe more paint will provide better coverage or reduce the need for another coat.
Unfortunately, heavy application can create runs, drips, uneven texture, and extended drying times.
How to Apply Paint Evenly
Load the roller with an appropriate amount of paint and distribute it evenly using the tray.
Work in manageable sections, applying consistent pressure.
Avoid repeatedly rolling over areas that have already begun drying.
In many situations, two properly applied coats produce a more consistent finish than one excessively heavy coat.
The exact number of coats depends on the product, surface condition, and color change.
Always follow the manufacturer’s recommended application thickness and coverage instructions.
6. Failing to Maintain a Wet Edge
Visible lap marks are among the most frustrating painting problems.
They occur when overlapping application areas dry differently, creating noticeable lines or variations in the finish.
This often happens when painters stop midway across a wall or return to an area that has partially dried.
Preventing Roller Marks and Uneven Coverage
Work systematically across the surface while maintaining a wet edge.
Complete manageable sections and overlap the previous section before it dries.
Avoid excessive brushing or rolling after the paint begins to set.
Sherwin-Williams notes that repeatedly working partially dried paint can contribute to brush and roller marks. Sherwin-Williams
For large walls or challenging lighting conditions, organize the work so you can finish a full section without unnecessary interruptions.
7. Removing Painter’s Tape at the Wrong Time
Painter’s tape helps create clean edges around trim, doors, windows, and other surfaces.
However, incorrect application or removal can produce unwanted results.
Tape that is poorly attached may allow paint to bleed underneath, while tape left in place too long may become difficult to remove.
Getting Cleaner Paint Lines
Apply tape to a clean, dry surface and press the edge firmly into place.
Choose tape appropriate for the surface, especially when working with delicate finishes or recently painted walls.
Follow the tape manufacturer’s recommended removal timing.
Remove it carefully at the recommended angle rather than pulling aggressively.
If dried paint bridges the edge, carefully scoring the paint film may help prevent peeling during removal.
8. Painting in Poor Weather or Temperature Conditions
Environmental conditions can significantly affect how paint dries and adheres.
Many DIY painters overlook room temperature, humidity, surface moisture, and direct sunlight when scheduling work.
Why Temperature and Humidity Matter
High humidity can slow the drying process for certain paints.
Cold conditions may interfere with film formation, while excessively hot surfaces can cause paint to dry too quickly.
Outdoor painting presents additional challenges because rain, wind, and temperature fluctuations can affect freshly applied coatings.
Sherwin-Williams recommends avoiding exterior painting immediately after rainfall, during fog, or when rain is expected. Temperature limits depend on the particular coating. Sherwin-Williams
Choose Suitable Painting Conditions
Check the product label for acceptable application temperatures and humidity conditions.
Avoid painting damp surfaces.
For exterior projects, consider the forecast and allow sufficient drying time before expected rain.
Indoors, maintain reasonable temperature and ventilation without directing strong airflow onto wet paint unless the manufacturer recommends it.
9. Rushing Between Paint Coats
One of the common mistakes DIY painters make is applying the second coat before the first has dried sufficiently.
Although the paint may feel dry to the touch, it may not be ready for recoating.
Applying another coat prematurely can disturb the underlying finish and produce streaking, lifting, or other defects.
Understanding Drying and Recoat Times
Paint drying time varies according to formulation, thickness, temperature, ventilation, and humidity.
Dry-to-touch time, recoat time, and full curing time are not interchangeable.
A surface may be ready for another coat long before it reaches its final hardness.
Always check the manufacturer’s technical instructions.
Avoid relying on one universal waiting period for every type of paint.
10. Forgetting to Protect Furniture and Floors
Painting accidents are not limited to walls.
Drips and splashes can damage flooring, furniture, countertops, and personal belongings.
Many beginners underestimate how far paint can spread during rolling or when moving equipment around a room.
Protecting Your Home Before Painting
Move furniture away from the work area whenever possible.
Cover remaining items with suitable protective materials.
Use drop cloths to protect floors and secure them to prevent slipping or movement.
Remove outlet and switch covers where safe and appropriate, rather than painting around them carelessly.
Keep paint containers stable and away from walkways.
Proper protection takes additional preparation time but can prevent difficult cleanup and unnecessary damage.
11. Overlooking Ventilation and Painting Safety
Painting safety is just as important as achieving an attractive finish.
Some paints and related products release chemical vapors during application and drying.
Poor ventilation can increase exposure, particularly in enclosed spaces.
Improve Indoor Ventilation
The U.S. Environmental Protection Agency recommends using appropriate ventilation to remove paint fumes and continuing ventilation during the initial drying period. US EPA
Open suitable windows when outdoor conditions allow and use securely positioned exhaust fans when appropriate.
Follow the paint label and safety data sheet for ventilation and protective equipment requirements.
Keep children and pets away from the work area.
Do not assume a low-odor paint is entirely free of potentially irritating emissions.
Be Careful With Ladders
Painting ceilings, stairwells, and high walls can require ladders or other access equipment.
Inspect ladders before use and position them on stable surfaces.
Avoid leaning beyond the side rails or standing on steps not intended for standing.
OSHA’s portable ladder guidance recommends maintaining three points of contact while climbing and following the ladder manufacturer’s instructions. osha.gov
For unusually high or difficult areas, professional assistance may be safer.
12. Ignoring Lead Paint Risks in Older Homes
One of the most serious DIY painting mistakes is disturbing old paint without considering potential lead exposure.
Homes built before 1978 may contain lead-based paint.
Sanding, scraping, and other preparation methods can release hazardous lead dust when lead-containing coatings are disturbed.
How to Handle Older Painted Surfaces
Before beginning preparation in an older home, determine whether lead-based paint may be present.
The EPA recommends that homeowners planning renovations in pre-1978 homes hire lead-safe certified contractors.
Homeowners who perform work themselves should follow appropriate lead-safe practices. US EPA
Never use ordinary dry sanding or uncontrolled scraping on potentially lead-containing paint.
Professional assessment and lead-safe work practices are particularly important when children or pregnant people may be exposed.
How to Plan a Successful DIY Painting Project
Avoiding common mistakes DIY painters make becomes easier when you approach the project systematically.
Begin by examining the surface and identifying any repairs or safety concerns.
Choose a suitable paint product and calculate how much you need using the manufacturer’s coverage guidance.
Purchase appropriate tools and protect surrounding areas.
Complete cleaning, repairs, and priming before applying the finish.
During painting, work in manageable sections and follow the recommended application and recoat instructions.
Finally, allow the coating to dry and cure as directed before returning furniture or subjecting the surface to regular cleaning.
A practical schedule with enough time for each stage is more useful than rushing to finish everything in one afternoon.
Frequently Asked Questions
What are the most common mistakes DIY painters make?
Common mistakes include poor surface preparation, using incorrect tools, skipping necessary primer, applying excessive paint, working over partially dried areas, and failing to follow drying instructions.
Why does my painted wall look streaky?
Streaking can result from uneven application, unsuitable rollers, inadequate coverage, or repeatedly rolling over paint that has started drying. Allow the coating to dry before assessing whether another properly applied coat is necessary.
Do I always need primer before painting?
No. Primer requirements depend on the surface, existing coating, stains, repairs, and selected paint. Bare or porous materials and certain problem surfaces frequently benefit from specialized primers.
How long should I wait between paint coats?
Follow the manufacturer’s recommended recoat time. Drying conditions and paint formulations vary, so a single waiting period does not apply to every product.
Can I fix roller marks after the paint dries?
Often, yes. Once the coating is thoroughly dry, suitable surface smoothing and careful repainting may correct visible marks. Follow the manufacturer’s instructions and use lead-safe precautions on older painted surfaces.
Is DIY house painting cheaper than hiring professionals?
DIY painting may reduce labor expenses, but tools, materials, preparation, time, and possible corrections still have costs. Professional painters may be a better choice for complicated surfaces, difficult access, or projects involving hazardous coatings.
Conclusion
Painting your own home can be a rewarding and cost-conscious way to improve its appearance. However, achieving a smooth, durable finish depends on preparation, suitable materials, careful application, and safe working practices.
Understanding the common mistakes DIY painters make can help you prevent problems before they happen.
Clean and prepare surfaces thoroughly, choose paint formulated for the job, and use appropriate brushes and rollers. Apply coatings evenly, respect drying times, and avoid working over partially dried paint.
Remember that safety matters just as much as appearance. Adequate ventilation, safe ladder practices, and appropriate precautions around older lead-containing coatings should never be overlooked.
A successful DIY paint job is not about working as quickly as possible. It is about completing each step correctly.
With thoughtful preparation, patience, and attention to detail, homeowners can achieve attractive results while reducing unnecessary frustration, wasted materials, and avoidable repairs.

Written by Twastia Editorial Team
Twastia Editorial Team shares practical insights about website design, SEO services, Google Ads, content marketing, social media, conversion rate optimization, and digital marketing strategy.
Last updated: Nov 5, 2026
Related posts from Twastia
Explore more useful articles from twastia.com about digital marketing, SEO, websites, ads, content, and growth strategy.