Fine to Medium-Grit Sandpaper: Complete Sanding Guide
A smooth, professional-looking finish often begins long before you apply paint, stain, or protective coating. Whether you are restoring wooden […]
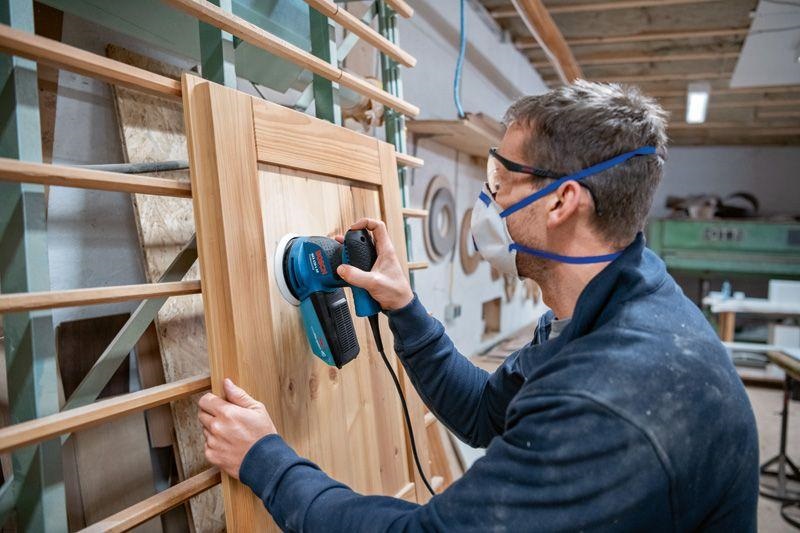
A smooth, professional-looking finish often begins long before you apply paint, stain, or protective coating. Whether you are restoring wooden furniture, preparing kitchen cabinets for painting, or finishing a DIY woodworking project, choosing the correct sandpaper can make a significant difference.
One of the most versatile options for home improvement projects is fine to medium-grit sandpaper.
These abrasive sheets help remove small surface imperfections, smooth rough wood, prepare surfaces for finishing, and create an even texture for paint or stain.
However, selecting sandpaper can be confusing. Different grit numbers, abrasive materials, backing types, and sanding techniques are designed for different tasks.
Using sandpaper that is too coarse may leave visible scratches, while starting with a grit that is too fine can make the work unnecessarily slow.
This guide explains sandpaper grit sizes, common applications, proper sanding techniques, safety precautions, and buying tips for American homeowners, woodworkers, and DIY enthusiasts.
What Is Fine to Medium-Grit Sandpaper?

Sandpaper is an abrasive material used to smooth, shape, or prepare surfaces.
It contains abrasive particles attached to a flexible backing, such as paper, cloth, or mesh.
The grit number indicates the approximate size of the abrasive particles.
Lower grit numbers mean larger particles and more aggressive sanding. Higher grit numbers mean smaller particles and smoother results.
Medium-grit sandpaper is commonly used for general surface preparation, while fine-grit sandpaper helps produce a smoother finish.
The classification may vary slightly between brands and standards, so always check the product’s intended application.
Understanding Sandpaper Grit Numbers
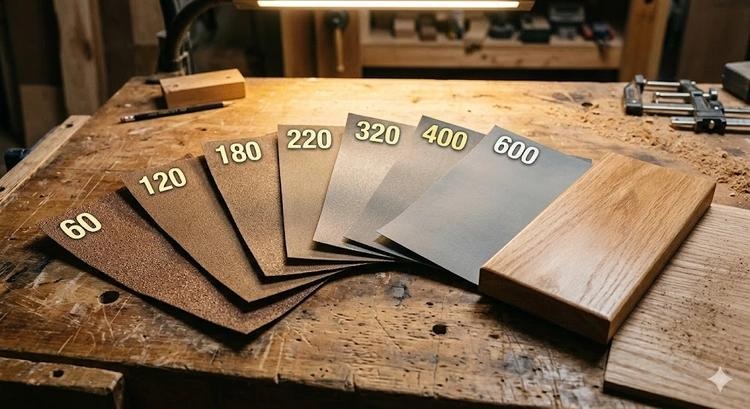
Choosing the right grit is essential for achieving consistent results.
The following chart summarizes common sanding applications.
| Grit Range | Classification | Typical Application |
|---|---|---|
| 36–60 | Coarse | Heavy material removal |
| 80–100 | Medium-coarse | Removing noticeable roughness |
| 120–150 | Medium | General wood smoothing |
| 180–220 | Fine | Final preparation before finishing |
| 240–320 | Very fine | Light sanding between coatings |
| 360–600 | Extra fine | Specialized finishing and polishing |
These categories follow general guidance published by 2Sand.
Medium-Grit Sandpaper: 120–150
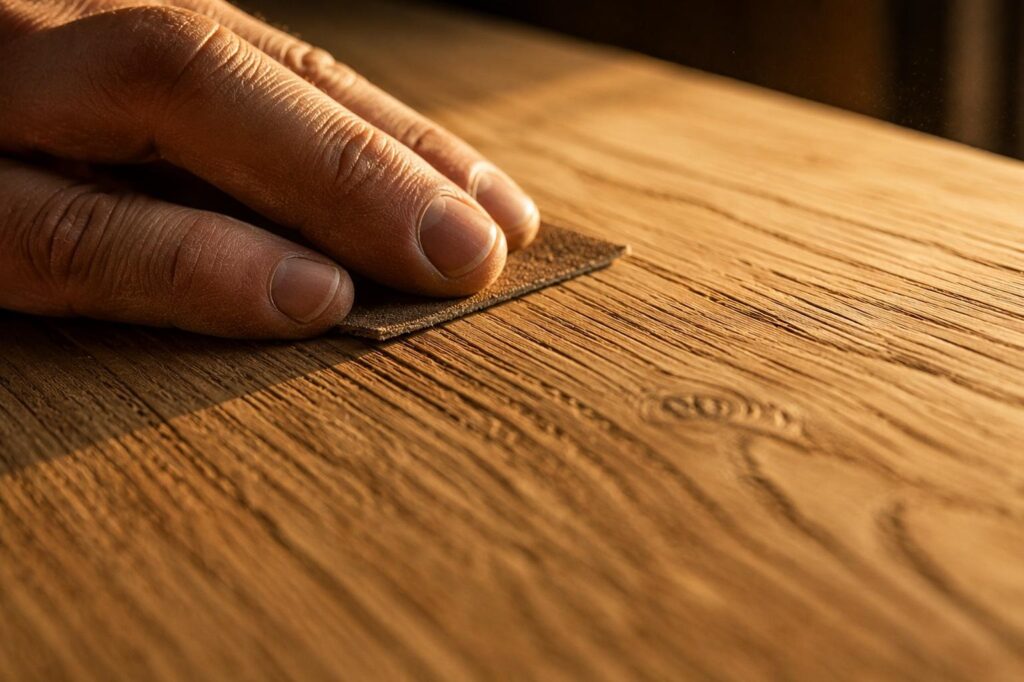
Medium grits are useful after major surface imperfections have been removed.
They help smooth raw wood, reduce sanding marks from coarser abrasives, and prepare furniture for additional finishing.
For many projects, 120 grit provides a practical starting point.
A 150-grit sheet can refine the surface before moving to finer abrasives.
Fine-Grit Sandpaper: 180–220
Fine sandpaper produces a smoother texture and removes relatively small imperfections.
Woodworkers frequently use 180 or 220 grit for final surface preparation, depending on the wood species and finishing product.
Always follow the coating manufacturer’s preparation recommendations.
Why Fine to Medium-Grit Sandpaper Is Important
Achieving a professional finish usually requires several sanding stages.
Medium-grit sandpaper removes scratches and uneven areas more efficiently than extremely fine abrasives.
Fine-grit sandpaper then helps refine the surface.
Using both allows you to balance material removal with finish quality.
This gradual process can improve the appearance of furniture, cabinets, wooden shelves, and other surfaces.
It also reduces the temptation to apply excessive pressure, which may damage softer materials.
Best Uses for Fine to Medium-Grit Sandpaper
1. Wooden Furniture Refinishing
Restoring furniture is a popular home improvement project.
Medium-grit sandpaper can help smooth previously stripped wood and reduce superficial roughness.
After the surface becomes even, finer sandpaper prepares it for an appropriate finish.
For example, you might begin with 120 grit on a clean wooden tabletop and progress through 150 and 180 grit.
Delicate veneers require particular care because sanding through the thin outer layer can permanently damage the appearance.
2. Kitchen Cabinet Preparation
Cabinet refinishing often involves cleaning, removing loose coatings, and creating an appropriate surface for primer or paint.
Fine or medium sandpaper may be suitable depending on the existing coating and the manufacturer’s instructions.
The objective is frequently to dull a sound glossy finish rather than remove every layer.
After sanding, remove dust and inspect for damaged areas before applying primer.
For older painted cabinets, check lead-paint safety requirements before disturbing the coating.
3. DIY Woodworking Projects
Woodworkers use different grits to prepare shelves, picture frames, wooden boxes, and decorative pieces.
Medium grit helps remove minor machining marks.
Fine grit refines the surface before staining or applying a clear finish.
Sanding consistently with the wood grain during final hand-sanding passes can help minimize visible scratches.
4. Preparing Drywall Repairs
Fine sanding abrasives can help level dried drywall joint compound before painting.
The appropriate grit depends on the compound and stage of finishing.
Use a light touch because aggressive sanding can expose drywall paper or create uneven surfaces.
A suitable sanding sponge or dust-controlled tool may be more convenient than loose sandpaper.
5. Metal Surface Preparation
Some aluminum oxide sheets can smooth appropriate metal surfaces before finishing.
Fine abrasives may also help remove light surface irregularities.
However, the correct process depends on the metal, existing coating, and required finish.
For heavily corroded surfaces, other preparation methods may be necessary.
Choosing the Right Sandpaper Material
Not all sandpaper products use the same abrasive particles.
Aluminum Oxide Sandpaper
Aluminum oxide is a popular multipurpose abrasive for woodworking and selected metalworking applications.
It provides a balance of durability and cutting performance.
For many household projects, it is a practical choice.
Silicon Carbide Sandpaper
Silicon carbide is a sharp abrasive commonly used for fine finishing and suitable wet-sanding applications.
It can work with certain metals, plastics, and finishes when the product is specified for those materials.
Water-resistant backing is necessary for wet sanding.
Garnet Sandpaper
Garnet is a traditional abrasive frequently associated with hand-sanding wood.
It can provide controlled sanding action but may wear faster than some modern alternatives.
Choose the abrasive based on your project rather than assuming every mineral performs identically.
Exploring Sandpaper Sheets From 2Sand
If you are comparing sanding products, the fine to medium-grit sandpaper options available through 2Sand provide examples of different abrasive materials and formats.
The U.S.-based sanding supply retailer offers products for woodworking, metalworking, automotive finishing, and other applications.
Its sandpaper collection includes aluminum oxide, silicon carbide, and specialty products.
Examples listed in its catalog include Norton ProSand sheets, Indasa RhynaLox aluminum oxide sandpaper, RhynoWet waterproof sheets, and 2SAND cabinet paper.
Many options are sold in 9-by-11-inch sheets, with package quantities varying by product.
The retailer also publishes a sandpaper grit guide that explains common sanding sequences.
Check the selected item’s available grit, backing material, pack size, and current price before ordering.
Sandpaper Sheets vs. Sanding Discs
Traditional sandpaper sheets are convenient for hand sanding and compatible sheet sanders.
A full 9-by-11-inch sheet can often be divided into smaller sections for appropriately sized sanding blocks.
Sanding discs are designed for compatible powered equipment, such as random orbital sanders.
These can help cover larger surfaces efficiently, particularly when equipped with suitable dust extraction.
For furniture edges, detailed corners, and delicate areas, hand sanding may provide greater control.
Using a sanding block helps distribute pressure across flat surfaces and reduces the chance of creating uneven depressions.
How to Use Fine to Medium-Grit Sandpaper Correctly
Step 1: Inspect the Surface
Before sanding, identify the material, existing finish, and visible imperfections.
Check for protruding nails, damaged veneers, loose paint, or contamination.
Determine whether the material requires special handling before abrasion.
Step 2: Select the Starting Grit
Choose a grit that removes the existing imperfections without unnecessarily scratching the surface.
For relatively smooth bare wood, 120 grit may be adequate.
Rougher wood may need an earlier pass with 80 or 100 grit.
Always test an inconspicuous area first.
Step 3: Sand With Consistent Pressure
Use smooth, controlled movements.
When hand sanding wood, work generally with the grain.
Avoid pushing excessively hard, as aggressive pressure can create uneven marks and wear out the abrasive faster.
Step 4: Progress Gradually
Move from medium to fine grits in sensible increments.
A common woodworking sequence is 120, 150, 180, and sometimes 220 grit.
Each stage should remove the scratches left by the previous grit.
Skipping directly from a coarse abrasive to a very fine one can leave visible marks.
Step 5: Clean and Examine the Surface
Remove sanding dust using appropriate extraction and cleaning methods.
Inspect the surface under angled lighting to identify scratches, uneven patches, or missed areas.
Before applying stain or paint, confirm the surface preparation requirements specified by the coating manufacturer.
Wet Sanding vs. Dry Sanding
Dry sanding is common for wood preparation and general furniture projects.
Wet sanding uses an appropriate liquid, usually water, with a compatible waterproof abrasive.
It can help control loading and improve certain finishing processes.
However, wet sanding is not suitable for every material or coating.
Untreated wood may absorb moisture and swell, while certain electrical tools must never be used with water.
Follow the abrasive and finish manufacturers’ instructions.
Wet sanding can reduce airborne dust but does not automatically eliminate exposure to hazardous substances.
Essential Sanding Safety Tips
Sanding produces fine particles that can affect respiratory health.
NIOSH identifies wood dust as a potential health hazard and recommends effective dust-control measures.
Use appropriate ventilation, dust extraction, and personal protective equipment selected for the material and exposure.
Eye protection is also important.
Special Precautions for Older American Homes
Homes built before 1978 may contain lead-based paint.
Sanding old painted surfaces can release hazardous lead dust.
The Environmental Protection Agency recommends hiring lead-safe certified contractors for relevant renovation work.
Contractors performing covered work must comply with applicable lead-safe renovation requirements.
Do not assume ordinary sanding precautions are sufficient for potentially lead-containing coatings.
How to Buy Sandpaper Without Overspending
For occasional DIY work, an assortment of 120, 150, 180, and 220 grit can cover many preparation tasks.
Frequent woodworkers may benefit from purchasing larger quantities of commonly used grits.
Compare the price per sheet, abrasive material, backing quality, and expected durability.
Cheap abrasive sheets may wear quickly or clog, increasing the number required.
However, expensive professional products are not automatically necessary for small household projects.
Buy compatible sizes and quantities based on your actual work.
Common Sanding Mistakes to Avoid
One common mistake is starting with sandpaper that is too coarse.
Another is skipping intermediate grits and expecting fine abrasives to remove deep scratches efficiently.
Excessive sanding can damage veneers, alter dimensions, or round edges unintentionally.
Using worn-out sandpaper can also reduce efficiency.
Finally, never overlook dust control or the possibility of hazardous existing coatings.
Frequently Asked Questions About Fine to Medium-Grit Sandpaper
What Is Considered Fine to Medium-Grit Sandpaper?
Medium sandpaper is commonly classified around 120–150 grit, while fine sandpaper generally covers 180–220 grit.
Exact classifications can vary by manufacturer.
Is 120-Grit Sandpaper Good for Wood?
Yes. It is commonly used for smoothing bare wood and removing minor surface imperfections.
The best starting grit depends on the wood’s condition.
Is 220-Grit Sandpaper Too Fine for Painting?
Not necessarily.
It can be useful for certain light surface-preparation tasks.
However, some primers and paints require different preparation methods, so follow the coating manufacturer’s directions.
Can I Use Fine-Grit Sandpaper on Furniture?
Yes. Fine abrasives are useful for preparing suitable wooden furniture for staining or finishing.
Use extra care with thin veneers and delicate decorative surfaces.
What Is the Difference Between 150 and 220 Grit?
150 grit removes material more aggressively.
220 grit produces finer scratches and is generally used later in the sanding process.
Can I Use the Same Sandpaper on Wood and Metal?
Some aluminum oxide products are suitable for both.
Always check the product specifications and choose an appropriate grit for the material.
Should I Sand Between Paint Coats?
Only when recommended by the paint or finish manufacturer.
Some coatings benefit from light sanding after curing, while others require no intermediate sanding.
How Do I Know When to Replace Sandpaper?
Replace a sheet when it becomes excessively clogged, torn, contaminated, or no longer cuts effectively.
Continuing with worn abrasives wastes time and may produce inconsistent results.
Conclusion: Get Better Results With the Right Sandpaper
Choosing fine to medium-grit sandpaper is an important part of achieving smooth, attractive surfaces.
Medium grits help remove minor irregularities and prepare materials for finishing, while fine grits refine the surface for a more polished appearance.
Whether you are restoring furniture, painting cabinets, or completing a woodworking project, the right abrasive can improve efficiency and finish quality.
Understand grit numbers, select compatible materials, follow a gradual sanding sequence, and prioritize dust safety.
With thoughtful preparation and suitable sanding supplies, even simple DIY projects can achieve cleaner, more professional-looking results.

Written by Twastia Editorial Team
Twastia Editorial Team shares practical insights about website design, SEO services, Google Ads, content marketing, social media, conversion rate optimization, and digital marketing strategy.
Last updated: Oct 14, 2026
Related posts from Twastia
Explore more useful articles from twastia.com about digital marketing, SEO, websites, ads, content, and growth strategy.